
How to Install W Beam Guardrail? A Step-by-Step Guide
W-Beam guardrails play a crucial role in ensuring road safety by preventing vehicles from veering off the road or colliding with obstacles. Proper installation of W-Beam guardrails is essential to maximize their effectiveness. In this comprehensive guide, we will walk you through the step-by-step process of installing W-Beam guardrails to enhance road safety.
Step 1: Conduct a Site Assessment
Before starting the installation process, it’s crucial to conduct a thorough assessment of the site. Identify potential hazards, curves, slopes, and any other factors that may impact the guardrail’s placement. Ensure that the chosen location complies with relevant safety standards and regulations.
Step 2: Gather Necessary Tools and Materials
To install W-Beam guardrails, you will need specific tools and materials. Ensure you have the following items:
- W-Beam guardrail sections
- Posts (wooden or metal)
- Post bolts and nuts
- End terminals
- Splice bolts
- Reflectors
- Impact attenuators (if required)
- Post driver or auger
- Level
- Measuring tape
- Wrenches
- Safety equipment (gloves, helmets, safety vests)
Step 3: Establish the Layout
Use measuring tape and stakes to mark the positions for guardrail posts. Ensure the layout complies with the specified guidelines for spacing and alignment. The correct spacing is crucial for the guardrail to function effectively during a collision.
Step 4: Install End Terminals
Attach end terminals to the guardrail sections to provide a smooth transition and prevent snagging in case of a collision. Follow the manufacturer’s instructions for proper installation. End terminals are essential for absorbing impact energy and minimizing damage.
Step 5: Set Up Posts
Place the posts at the predetermined locations along the guardrail layout. The type of posts (wooden or metal) and their spacing should meet safety standards. Use a post driver or auger to secure the posts firmly into the ground.
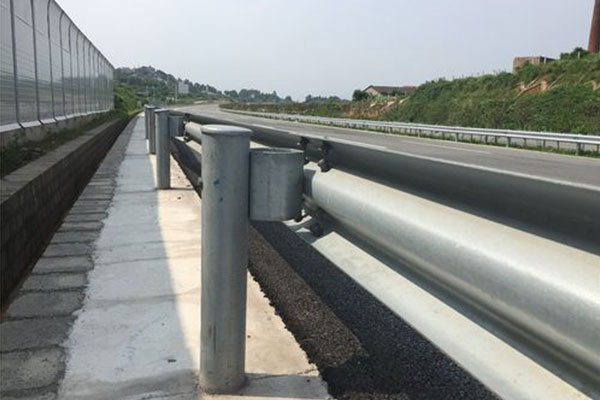
Step 6: Install W-Beam Sections
Attach the W-Beam guardrail sections to the posts using bolts and nuts. Ensure the guardrail is level and aligns with the layout. Tighten the bolts securely to guarantee stability.
Step 7: Connect Guardrail Sections
If your installation requires multiple guardrail sections, use splice bolts to connect them securely. Properly aligned and connected sections ensure the continuity of the guardrail system.
Step 8: Add Reflectors
Enhance visibility by adding reflectors to the guardrail. Reflectors improve visibility in low-light conditions, contributing to increased safety on the road.
Step 9: Perform Quality Checks
Conduct a thorough inspection of the installed guardrail system. Check for proper alignment, tightness of bolts, and compliance with safety standards. Make any necessary adjustments to ensure the guardrail functions as intended.
Conclusion:
Proper installation of W-Beam guardrails is crucial for ensuring road safety. By following these step-by-step guidelines, you can contribute to creating safer roadways and preventing accidents. Always adhere to local safety regulations and guidelines during the installation process to guarantee the effectiveness of the guardrail system.